Puppets with Personality! A great project to do at home. Wonderful to extend into a Potluck Puppet Project with friends!
Here is a great way to make a beautiful
and lasting puppet with your favorite children!
Puppets with Personality! Step
4 Step 5
Step 6 Step
8 Step 9
Potluck Puppets
|
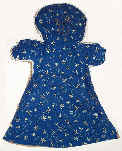
Materials: Base: 1 yard of 54 inch fabric will make 3 puppets if you cut carefully. You can use a cotton calico weight but a twill is stronger. Or, try various light-weight upholstery fabrics. We've found good fabric at chain stores, even in the remnant bins or clearance aisles. A stronger twill might cost $6.99 per yard when it is full price. Batting: 1/2 a yard will make 3 puppets. Lining: 1 yard of calico is more than enough. Clothing: Share your yard of calico, or buy 1/4 yard pieces of two or three cheerful patterns. Tiny checkers make great suit jackets or pants. Denim is great -- lighter weights are easier to sew. Facial features: You can draw on the face with permanent markers (might run a bit) or fabric markers (more expensive). Or, you can draw them on with a ball point pen and then stitch over with a deep brown thread (by hand, or machine). Fabric markers can decorate eye color and lip color. |
|
|
|
1. Print pattern (coming soon) or sketch outline of puppet on newspaper. |
2. Cut one puppet shape from skin toned fabric. Draw on facial features. I recommend using an ink pen so you can easily see the lines when you sew over them. |
3. Lay puppet over batting. Cut out enough
batting so the head, arms, and chest of the puppet will be lined.
Lay puppet with batting over a rectangular piece of lining fabric. Pin all three layers together. |
|
4. Going over all three layers, hand embroider facial features or use your sewing machine. Machine tips: narrow zig zag stitch, use stitch length of almost 0. You need to slowly drive the sewing machine over each line. Use a medium brown that complements the skin tone. For pale skin tones, try a light tan. For dark skin tones, try a golden brown or chestnut color. |
5. After the facial features are embroidered, baste around all the edges of the puppet shape (you are attaching the puppet to the batting and the lining). Be sure to stitch along the bottom edge so the layers stay sealed when the puppet is used. Trim away the excess lining and batting. |
6. Lay the puppet, embroidered side down, onto another rectangle of matching skin toned fabric. Stitch 3/4 of the way around the puppet, making sure to leave an opening at the bottom! I do this twice to be sure my side seams are strong. Trim away excess. |
| 7. Before you turn the puppet right-side out, use a sharp scissors to snip every quarter of an inch around any curves in the puppet. Don't cut your seams! |
8. Turn puppet inside out. |
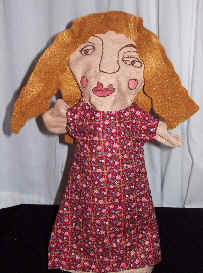
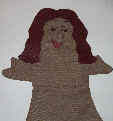
9. Add felt, wool, fleece, etc. for hair. |
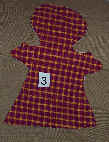
| 10. Add clothing. | 11. 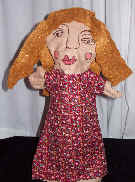 Invite a child to draw the facial features. They turn out beautifully! |
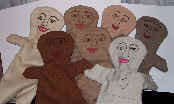
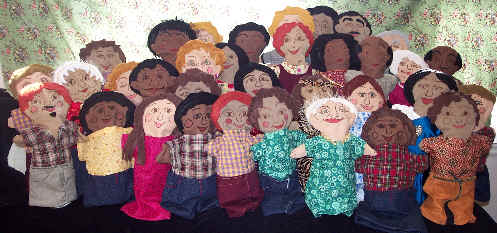
12. Invite other people to join you. Take a look at a collective puppet collection from our school! |
© 2003 ShiningHours.com. Butterfly Central and Add-Art Illustration Page are Trademarks of ShiningHours.com. All rights reserved.